
Although it may seem false to tile directly over an existing tile surface, doing so can save a lot of time and effort under the right circumstances. And no one will ever know once the new tiles are laid without a hitch!
In most cases, a sound and stable sub-surface can be achieved by removing old tiles before re-tiling and grouting tiles. However, there are situations in which tiling directly on top is the quickest solution. You’ll have extra minutes to peruse the internet for the most recent and greatest kitchen and bathroom tile designs.
While we recommend removing the existing tiles here is a guide with helpful hints from the pros to tile over tile.
When Shouldn’t I Tile Over Tile?
It is never a good idea to tile over broken tiles because the new tiles will eventually come loose. Therefore, it is essential to check for any cracked tiles or movement. Make sure the tiles are securely bonded by tapping them gently with a hammer. If they sound hollow, that’s a red flag. Use a long spirit level to ensure they are also flat and level.
You shouldn’t continue unless you’re positive that the currently installed tiles are firmly adhered, stable, and flat.
What if my floor tiles aren’t level?
Tiling over floor tiles is less of a hassle than tiling over wall tiles because you won’t have to worry about the weight of the new tiles. Since you’ll be tiling the walls from top to bottom, you won’t have to worry as much about the edges.
A layer of self-leveller can be poured over an uneven floor to make it level. According to Porcelain Superstore’s Director, Abbas Youssefi, a perfectly flat and stable base is created with this. To prevent doors from becoming jammed, it is imperative that you leave adequate space between the new floor level and any obstacles in the room.
Materials Needed
A tile cutter, grout finishing tool, bucket, and a drill fitted with a mixing paddle attachment (or a stick!) are all necessities.
Tools needed include a long spirit level, a sponge, tile spacers, a notched and straight-edge trowel, a tape measure, and a pencil.
Tile Over Existing Tiles: A How-To Guide
1. Clean the Present Tiles
The current tiles must be clean, dry, and free of dust and grime in addition to being flat, level, and undamaged. A solution of sugar soap and hot water works wonderfully.
Then, apply an acrylic primer to the current tiles using a roller and key the surface. Keying a surface is done to help your adhesive grip the wall or floor; it creates small, rough grooves that maximise adhesion. The simplest way to create a mechanical key to your surface is by using sandpaper, a sander or scoring it with a knife or scraper. Keying is more important for walls than floors because of the force of gravity.
2. Pick Tiles That Work
When laying tiles on top of tiles, height is the primary consideration. Thick tiles, such as those made of natural stone, can add excessive height, which may have an impact on the door thresholds. Not removing the old tiles might not save you time or money if the change in floor height makes it difficult to join the tiles to other floors and means you need to alter doors or add steps.
It’s also important to be mindful of how much weight you’re adding to walls. Plaster and plasterboard to tile backer will have a recommended weight limit, but solid walls pose fewer difficulties. For reference, a square metre of skimmed plasterboard can only support about 20 kilograms of tiles and adhesive. The best solution is to replace the tiles with new ones that are thin and lightweight, such as ceramic.
Getting rid of the old tiles is a good idea if you plan on installing marble or other heavy tiles.
3. Use Appropriate Adhesive
Select an adhesive designed for direct tile-to-tile installation. For best results, use a latex-modified or flexible adhesive. When tiling on tiled walls, the maximum tile size allowed by some adhesives is especially important to keep in mind.
Always check on the tub or packet or ask your supply for advice to ensure it is suitable.
4. Arrange the New Floor Tiles
As with tiling any other surface, it’s important to map out your initial placement. Taking the time to measure the distances between walls will help you avoid having narrow strips of tile at the corners and edges of your finished project.
Overlapping the grout lines is more important than stacking tiles of the same size when it comes to tiling over existing surfaces. Intersecting will create a stronger key and more evenly distribute the work (on walls).
5. Install the Tiles
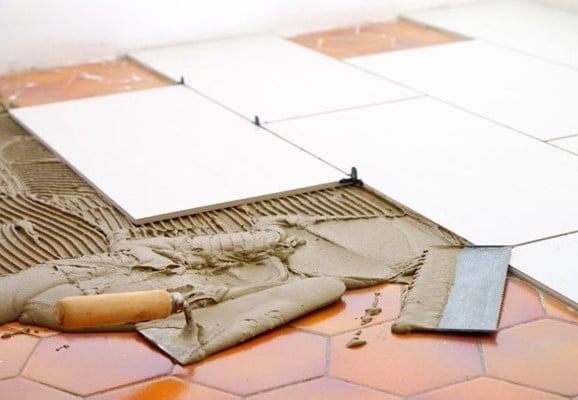
It’s the same to tile over tiles as it is over any other surface. To get uniform grout lines use spacers and spread the adhesive out with a notched trowel in which the grooves run in one direction.
The tile should be pushed firmly into place and then jiggled slightly to allow the adhesive grooves to suction the tile to the surface. After the tiles have been laid and the grout has been cleaned up, the adhesive should be allowed to dry for the time specified in the manufacturer’s instructions. Don’t risk breaking them by walking on them now.